The ManicaPost

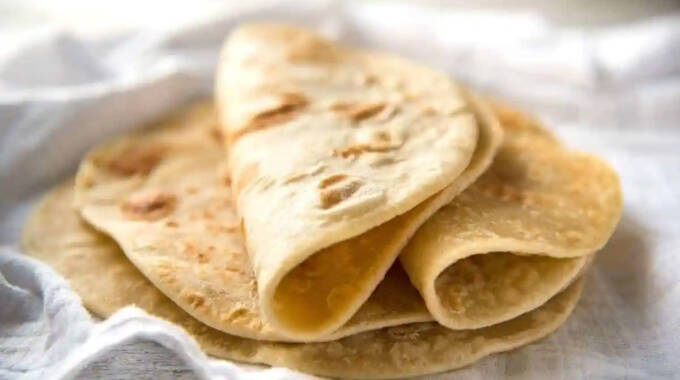
THIS flatbread recipe is made with no yeast.
It is very easy to make, requiring just a minute or two of kneading.
And it honestly is beautifully soft and pliable.
So soft you can use it as a wrap and it won’t crack.
If you have never tried homemade bread before, this flatbread recipe is a great one to start with because it really is that easy.
The worst that can happen with this flatbread recipe is that the heat is too high when you cook it so the exterior ends up a bit too crunchy and cracks when you roll it.
If that happens, just spray it with olive oil or brush lightly with oil or butter and it will moisten the surface.
Try this once, and store-bought flatbreads will never be the same again.
That I can promise!
Ingredients:
Cups Metric
2 cups plain flour (all purpose flour) (level cups, unsifted, not packed), + keep 1/4 cup extra for dusting & adjusting dough
1/2 tsp salt
3 1/2 tbsp / 50g unsalted butter (1.75 oz)
3/4 cup milk
Instructions:
Melt butter in milk: Combine butter and milk and heat until butter is just melted – on stove or in microwave.
Combine Dry: Combine 2 cups flour, salt, butter and milk in a bowl.
Knead 2 minutes: Sprinkle work surface with flour then knead for a few minutes until it is smooth it doesn’t need much kneading. Add extra flour if the dough is too sticky.
Rest 30 minutes: Wrap with cling wrap and rest at room temperature for 30 minutes or so.
Roll into rounds: Dust bench top with flour, cut dough into 6 pieces, roll into balls, then roll out into 20cm / 8” rounds, 2 – 3 mm thick.
Heat pan: Heat a non stick pan over high heat (no oil). (Note 1)
Cook: Place one flatbread in the pan, cook for around 1- 1 1/2 minutes – it should puff up dramatically. Once the underside has nice golden patches on it, flip and cook the other side for 45 seconds to 1 minute until the underside has golden spots and it puffs up again.
Keep wrapped in tea towel: Stack the cooked bread and keep wrapped with a tea towel – the moisture helps soften the surface, making them even more pliable.
Continue to cook with remaining pieces.
Brush with butter or oil (optional): Brush or spray bread with olive oil or melted butter, for a more luxurious finish.
Or even with melted butter mixed with minced garlic for a garlic butter version!
Recipe Notes:
Higher heat and the thinner the dough = crispier crust, though still pliable inside, the thin crispy crust on the outside might crack when you roll it.
This is how I make naan.
The larger darker brown spots on the bread (see image in post) make it look like authentic naan, just like what you get at Indian restaurants! (If you got the time, here’s my proper naan recipe made with yeast.
It’s just like you get at Indian restaurants – super soft and fluffy!)
Storing: Dough keeps in the refrigerator for around 3 days.
Tip: Roll out the rounds, ready to cook.
Just make sure you use baking paper or cling wrap to keep the pieces separated, flour will not suffice.
Cooked breads keep really well in the freezer!
Wholemeal flour – Works great with WHOLE WHEAT flour, does not work with almond flour. See note 4 for Gluten Free.
Dairy free/ vegan substitutions: A reader tried the original recipe then reported back that it also worked just as great substituting the butter with olive oil and almond milk for the dairy milk to make it a vegan / dairy free version.
Brilliant!
Another reader has also made this with coconut oil and reported it works great.
Gluten free option – This works pretty well with Gluten Free flour.
You may need a bit of extra flour to roll it out – just add more as required.
The texture is a bit different – a bit chewy, and you may not be able to roll them out into neat rounds like pictured. – Recipetineats.com.


